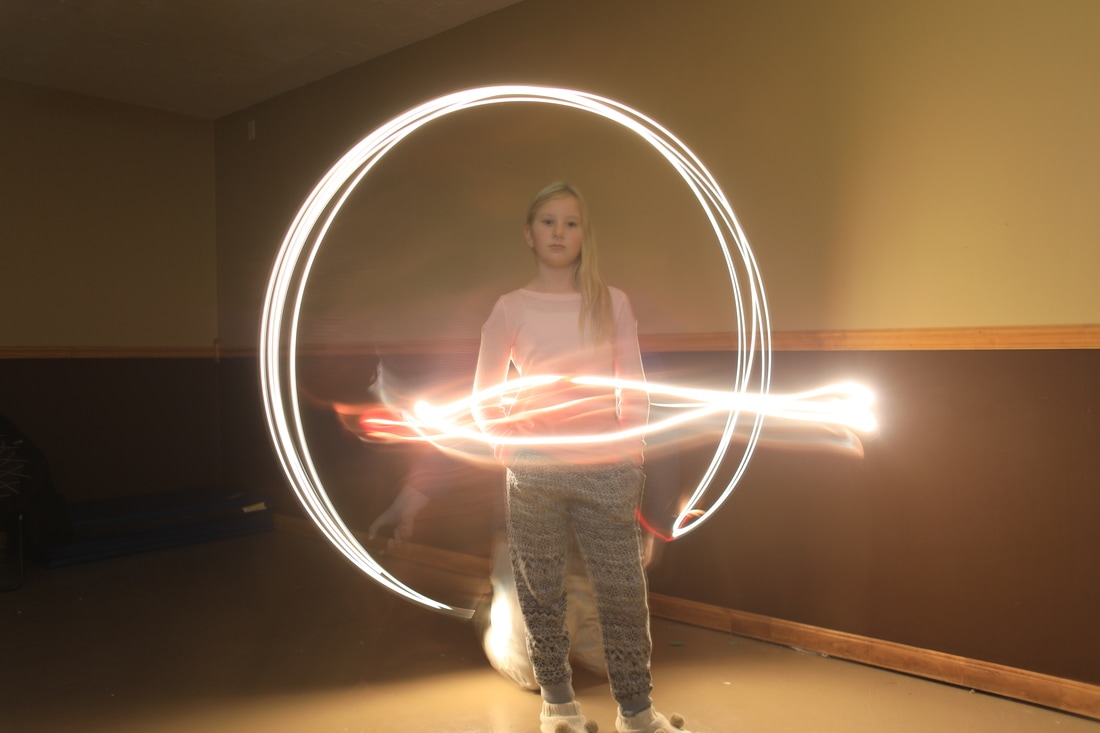
Original Photo - Carriage
Process for Original Photo - Carriage
I used a Cannon camera to take my picture. First, I set the shutter speed at -1.3 before beginning. To start I would press the delay picture and had my dad use a light stick and create a rainbow around my legs swinging his arm back and forth three times. To create the cross light and the carriage effect I used a separate light stick and went back and forth from left to right in front of me. The changed shutter speed left the shutter open for a longer time and allowed the camera to capture all of the different lights that I used. It was a 5 second shot.
I used a Cannon camera to take my picture. First, I set the shutter speed at -1.3 before beginning. To start I would press the delay picture and had my dad use a light stick and create a rainbow around my legs swinging his arm back and forth three times. To create the cross light and the carriage effect I used a separate light stick and went back and forth from left to right in front of me. The changed shutter speed left the shutter open for a longer time and allowed the camera to capture all of the different lights that I used. It was a 5 second shot.
Feature Video - All About NES
youtu.be/tayYsto1q_w
PSA Video - Lockdown Drill
youtu.be/Ud2pkfCvGoY
Book Trailer - The Only Girl In School
https://www.youtube.com/watch?v=uhJb1sCKZbY
(Cut and Paste above - view video below)
https://www.youtube.com/watch?v=uhJb1sCKZbY
(Cut and Paste above - view video below)
The Only Girl in School Process:
To create my book trailer I used many steps, including the steps to create my design. First, I had to choose a book to use and choose an iMovie template that followed the rubric guidelines. Next, I had to create a storyboard on paper using the storyboard template from the iMovie application I had to draw out the design for my trailer. Finally, I was able to film my ideas and I uploaded my film to the MacBook. I used the iMovie application and followed the template by choosing the template with the appropriate times and typing in the information for my headings and subheadings using my storyboard. The last and final step was to upload to YouTube and download to our S.T.L.P. website.
To create my book trailer I used many steps, including the steps to create my design. First, I had to choose a book to use and choose an iMovie template that followed the rubric guidelines. Next, I had to create a storyboard on paper using the storyboard template from the iMovie application I had to draw out the design for my trailer. Finally, I was able to film my ideas and I uploaded my film to the MacBook. I used the iMovie application and followed the template by choosing the template with the appropriate times and typing in the information for my headings and subheadings using my storyboard. The last and final step was to upload to YouTube and download to our S.T.L.P. website.
Confetti Girl Process:
To create my book trailer I had to choose a book that I had read. I chose the book Confetti Girl. I chose this book because I really like it and the main character Apolonia Flores is just very smart and funny and I like her very much. Apolonia tries to solve a mystery. We filmed all our scenes on an iPad and I had to choose a template from the iMovie application found on the iPad. I used a paper copy of a storyboard, it has a bunch of boxes with lines under the boxes. You have to draw out and create your scenes before you can start filming. The trailer was saved as a film and emailed to be downloaded to our school S.T.L.P. website.
To create my book trailer I had to choose a book that I had read. I chose the book Confetti Girl. I chose this book because I really like it and the main character Apolonia Flores is just very smart and funny and I like her very much. Apolonia tries to solve a mystery. We filmed all our scenes on an iPad and I had to choose a template from the iMovie application found on the iPad. I used a paper copy of a storyboard, it has a bunch of boxes with lines under the boxes. You have to draw out and create your scenes before you can start filming. The trailer was saved as a film and emailed to be downloaded to our school S.T.L.P. website.
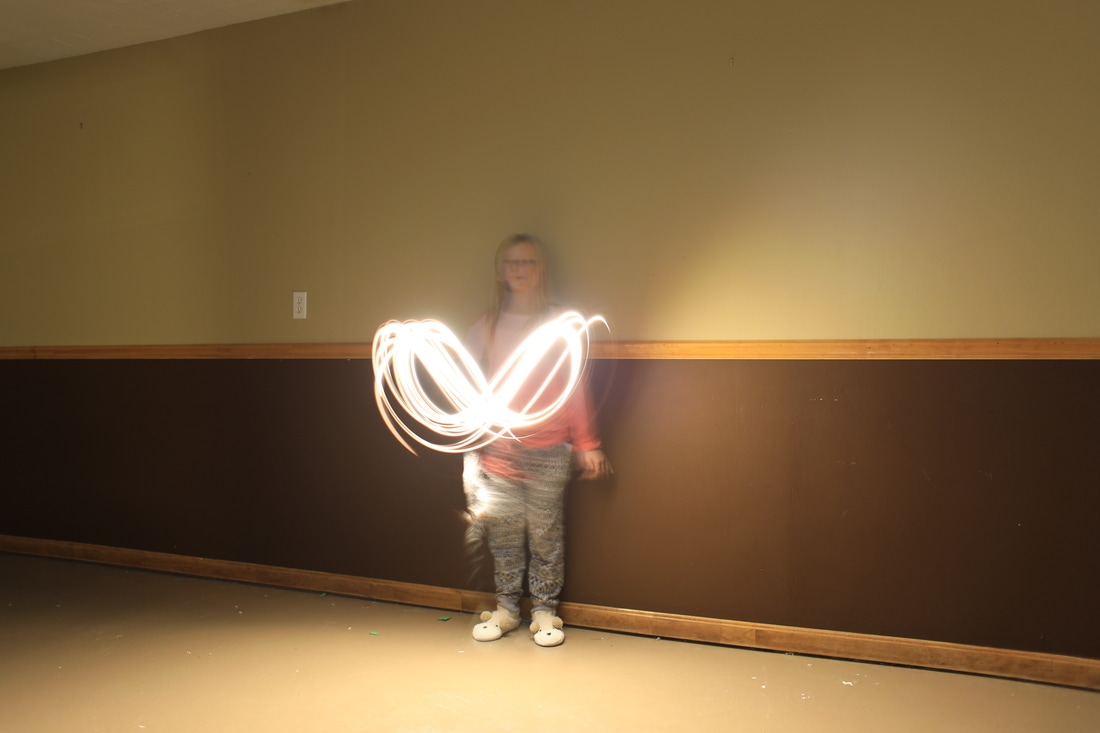
Original Photo - Bow Tie
Process for original photo: Through the Trees
I took my pictures using a Cannon camera. First, I set the shutter speed at -1.3 before beginning. To start I would press the delay picture and get in position. To create the bow tie effect I used a light stick and swung my arm in a figure 8 in front of me. The changed shutter speed left the shutter open for a longer time and allowed the camera to capture all of the different lights that I used. It was a 5 second shot.
Feature Film: All About NES
https://youtu.be/3qDZUv2O2ZU
KSU GIS/Maps/Cartography - GPS STARS
|
Graphic Design Product - STLP Logo Northern Elementary
| ||
| stlp_logo_nes_2017.pdf |
Graphic Desgin Product Process - STLP Logo Northern Elementary
S.T.L.P. LOGO DESIGN DESCRIPTION
I was super excited to design the Northern Elementary S.T.L.P. logo! I have a lot of fun doing art and S.T.L.P. so combining the two together is so much fun! At S.T.L.P. we spend so much time on technology I thought that using an ipad as the background was a really good idea! This logo took a lot of steps.The first step was: my brainstorming. I worked a lot on the brainstorming part. It was very cool thinking of all my ideas and trying to pick one. Then I narrowed it down to 2 ideas! Then I took my second step: Asking people what they thought was best. I asked my parents and my friends! The ipad version won! I took my third step: Sketching it out on paper. I loved this part, it was my favorite step to take! Finally I did my fourth and final step. I designed the logo with my mom’s software. The final artwork was designed in Adobe Illustrator software and saved as a PDF file. I illustrated this logo on the computer by using lines that were sort of rounded at the end and putting them together to make an ipad looking shape then i took another rectangle and put it in the center of the rounded rectangle, leaving a little bit of space for the camera and the home button. I evened everything out and took a dot and put it on one side like a camera and put a bigger dot on the other side like the home button. I put a little tiny square in the center of the bigger square! Once I finally got finished illustrating the logo I decided it needed something else. So I decided to add a charger to the ipad to make it more realistic! I thought that the charger was a good expansion to my idea! I have so much fun doing S.T.L.P projects and I am so happy that I got to do the graphic design for S.T.L.P.